

While USDA Hardiness Zone 7 does have a long growing season, when it gets close to the fall season, a lot of us feel like the opportunity to grow our gardens just flew by. But what if you can extend the garden season a bit longer? The good news is, the potential to prolong your garden’s life is very much within reach, and I’m here to guide you through it!
This complete guide is pretty long, so if you want to skip ahead…
- Understanding Zone 7 Climate
- Extending Zone 7’s Growing Season
- Use Row Covers and Garden Fabric for Frost Protection
- Set Up Hoop Houses, Cold Frames, and/or Cloches
- Benefits of Mulching for Soil Temperature Regulation
- Soil Management for Cold Weather
- Water Management in Colder Months
- Wind Protection for Zone 7 Gardens
- Use Greenhouses in Zone 7
- Grow Winter Vegetables and Cold-Hardy Varieties
- Start Seeds Indoors
- Bring Your Garden Inside – How to Move Your Plants Indoors
- Additional Resources
Understanding Zone 7 Climate
Zone 7 has a moderate climate, but like any other zone, it has it’s own set of challenges. Gardeners can expect their last frost dates to be around mid-April and the first frost dates in mid-October. This gives you a relatively long growing season, but it can sometimes be unpredictable.
Quick frosts, varying temperature ranges, and sudden cold snaps are challenges that gardeners in your zone might face. The temperature alone isn’t the only thing to consider with the climate though…
- Temperature Ranges: Zone 7 typically has daytime summer temperatures ranging from 75°F to 95°F, with nighttime temperatures dropping to between 50°F and 70°F. Winters, on the other hand, see daytime temperatures of 30°F to 60°F, with nighttime lows sometimes dipping below freezing.
- Fall Temperature Ranges: This is the season you’re likely currently worried about. Autumn temperature ranges in Zone 7 can vary depending on the region. Daytime temperatures during the fall can be pleasantly mild, often between 55°F to 75°F, with nighttime temperatures dropping to 40°F to 55°F. The first frost date in Zone 7 is typically in mid-October, but it can occur earlier in some years.
- Rainfall and Humidity: Rainfall in Zone 7 can be quite varied, averaging between 30 to 60 inches annually, depending on the region. Humidity levels can also vary a lot. For example, the southeast usually experiences muggier conditions compared to the drier west coast.
- Gardening Challenges: The unpredictable nature of Zone 7’s weather patterns can sometimes catch gardeners off guard. Sudden cold snaps, unexpected warm spells, and variations in humidity can pose challenges. Early frosts, particularly, can be devastating, especially when plants haven’t fully matured.
Still, the outdoor temperature is crucial to follow. It can always shift quickly, but to get a good prediction on when your first frost date is expected, look up your zip code in Almanac.com’s free frost date tool.
Why Does the Frost Date Matter?
The frost dates are possibly the most important factors to consider when planning your garden in Zone 7. The first frost date is the date when the average temperature is expected to drop below freezing for the first time in the fall.
This means that any plants that are not frost-tolerant will be killed (I hate using that word with plants) if they are outside during this time. Frost-tolerant plants that are planted outside too close to the first frost are also highly susceptible to dying off, so you’ll want to get those ready early. More on that later.
Here are some estimated last frost dates for Zone 7:
- Northeast: October 15-25
- Midwest: October 20-30
- Southeast: October 25-November 5
- West Coast: November 5-15
*It is worth noting that the frost date can be different for different elevations. For example, the frost date will be earlier at higher elevations.
Late Season Challenges in Zone 7
In addition to the challenges mentioned in the previous section, gardeners in Zone 7 also face a few challenges around the fall season, including:
- Unexpected or Early Frosts: Generally, mid-October is the average first frost date for Zone 7. Unfortunately, early frosts can surprise gardeners. These sudden frosts can damage or kill plants, especially those that aren’t frost tolerant or even frost tolerant plants that haven’t gotten a chance to be adequately protected or acclimated.
- Unpredictable Rainfall: Fall can be a time of inconsistent rainfall in Zone 7. Periods of excessive rain can lead to waterlogged soil and root rot, while unexpected dry spells can stress plants. Wet weather can also create a breeding ground for pests and diseases.
- Pests and Diseases: Late season pests, such as aphids, caterpillars, and slugs, can become particularly problematic. Fungal diseases, spurred by cooler and more humid conditions, can also flare up, affecting the foliage and fruit of plants.
- Shortening Daylight Hours: As days get shorter, plants receive less sunlight. Sunlight equals life for plants. The reduced sunlight means that your plants have less time to photosynthesize and produce food. This can affect the growth and development of plants, especially those that require a lot of sunlight.
- Soil Temperature Fluctuations: Soil temperatures start to drop as winter approaches. For some plants, especially root vegetables, this can be beneficial. However, for others, especially tropical plants or those in pots, the cold soil can be harmful. The cold can kill a plant, but also major swings from warm to cold and back can stress your plants.
- Wind and Storms: Fall can bring stronger winds and occasional storms. If you’re on the east coast of the United States, peak hurricane season lasts from August until early October. These conditions can damage plants, break branches, and disrupt the garden layout.
Extending Zone 7’s Growing Season
Now that we’ve got all of that doom and gloom about the late season climate out of the way, let’s get into those tips for getting a longer growing season!
Use Row Covers and Garden Fabric for Frost Protection
Introduction to Row Covers and Their Types:
Row covers, often made of a lightweight and breathable material, are fabrics laid directly over plants or supported by hoops. They come in various weights, from light to heavy, depending on the degree of frost protection needed. You can find them in a variety of materials, including plastic, fabric, and mesh.
How They Protect Plants from Frost:
Basically, row covers act as a blanket, trapping heat from the soil and preventing it from escaping. This creates a microclimate beneath the cover, raising the temperature by several degrees, enough to protect plants from light frosts.
Tips on When and How to Use Them in Zone 7:
- Start using row covers when nighttime temperatures consistently drop to the mid-30s.
- For delicate plants, opt for heavier-weight row covers.
- Secure row covers in place with stakes or weights to ensure the fabric is secure against strong winds.
- On warmer days, remember to remove or ventilate to prevent overheating. The simplest way you can ventilate is to leave the ends of the row cover open.
Set Up Hoop Houses, Cold Frames, and/or Cloches
Hoop houses, cold frames, and cloches are convenient and more affordable option that building a greenhouse, by accomplishing pretty much the same task.
Differences between hoop houses and cold frames
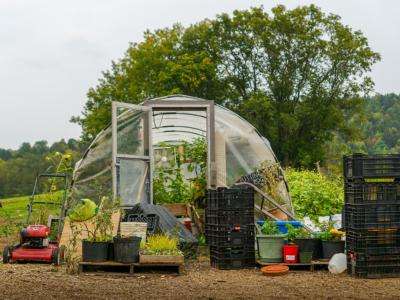
Hoop houses are typically larger, made with plastic sheeting stretched over semi-circular hoops. This allows for more airflow, which can help to prevent mold and mildew.
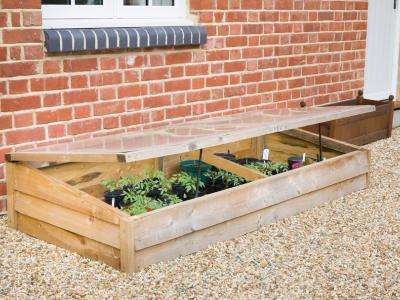
Cold frames are smaller structures, usually with a rigid structure with a bottomless box style. Most of the time they will transparent top that can be propped open for ventilation. These have a more enclosed structure, which helps retain heat more. They are less complex to build, and usually less expensive.
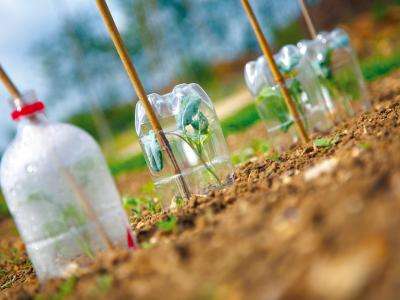
Cloches: Cloches are small structures that are typically made with glass or plastic. They act essentially act as mini-greenhouses. They are perfect for individual plants or small plant groups. In a pinch, you can even make some DIY plant cloches out of plastic bottles like in the picture below.
| Feature | Hoop House | Cold Frame | Cloche |
| Cost* | Less expensive | More expensive | Least expensive |
| Size | Larger | Smaller | Individual/very small |
| Complexity | More complex to build | Less complex to build | Simplest to use |
| Material** | Metal or PVC pipes with clear plastic sheeting | Wood with either glass or opaque plastic | Glass or plastic |
| Durability | More durable | Less durable | Varies based on material |
| Ventilation | Requires more ventilation | Requires less ventilation | Minimal ventilation |
| Heat retention | Moderate heat retention | Highest heat retention | Lowest heat retention*** |
| Suitable for | Growing a wider variety of plants | Growing a smaller variety of plants | Individual plants or small groups |
*DIY cold frames are cheaper to build, but they can get expensive when you buy a pre-made one
**Thanks to the abundance of competition on Amazon, you can now find each of these products with different materials.
***Plastic is most often used for cloches, which has very poor heat retention. Glass cloches have much higher heat retention though.
Benefits of each for extending the growing season
Hoop houses and cold frames can both be used to extend the growing season in Zone 7. Hoop houses are larger and can accommodate taller plants and more crops, so they are a good option for gardeners who want to grow a wider variety of plants. Cold frames are a better option for gardeners who want to protect tender plants from frost, as they provide more insulation.
Step-by-step guide to setting them up
When setting up either a hoop house or cold frame, choose a sunlit location, install the base, and ensure adequate ventilation to prevent overheating.
- Choose a Location. Choose a sunny, well-draining location away from tall trees or structures that might shade the growing area. The location should also be protected from strong winds and drafts.
- Prepare the Grond. The base for a hoop house or cold frame can be made from wood, metal, or concrete. If you are using wood, make sure that the wood is treated to resist rot and decay.
- Hoop House: Level the ground and remove any debris or large rocks. Consider laying down a weed barrier if you’re concerned about weeds growing inside.
- Cold Frame: Level a smaller patch of ground and remove any debris from the area. If desired, you can lay a base such as gravel for drainage.
- Cloches: You can place cloches directly on the ground or on a raised bed. Make sure that the ground is level and free of debris.
- Install the Frame.
- Hoop House: Use metal or PVC pipes to create a framework for your hoop house. The frame should be sturdy enough to support the weight of the plastic covering.
- Cold Frame: Use wood to create a frame for your cold frame. The frame should be sturdy enough to support the weight of the glass or plastic covering.
- Cloches: No installation necessary – simply place it over the plant.
- Cover the Frame
- Hoop House: Cover the frame with plastic sheeting, greenhouse film, or other transparent material. Make sure that the covering is tightly secured to the frame to prevent leaks.
- Cold Frame: Cover the frame with glass or plastic. Make sure that the covering is tightly secured to the frame to prevent leaks.
- Cloches: Place the cloches over the plants you want to protect. Make sure that the cloches are secure so that they don’t blow away in the wind.
- Ventilation. Hoop houses and cold frames need adequate ventilation to prevent mold and mildew.
- Hoop House: Roll up the sides or install side vents.
- Cold Frame: Prop open the top during warmer days.
- Cloche: Lift or tilt to provide airflow as needed.
Benefits of Mulching for Soil Temperature Regulation
Mulching is a good idea for most of the season, but it is super important to do around fall if you want to extend your growing season.
Why mulching is essential for temperature control
Mulching involves applying a layer of organic material, such as bark chips, straw, or compost, to the soil around plants.
Here’s why it’s crucial for Zone 7 gardening:
- Soil temperature regulation: Mulch acts as an insulator, keeping the soil warm during cooler temperatures and cool during warmer days. This stable environment promotes root growth and overall plant health. Mulching can help to extend the growing season in both directions.
- Moisture Retention: Mulch helps the soil retain moisture by reducing the rate of evaporation. This means plants are less likely to suffer from drought stress during drier periods, making this especially important in hot, dry climates.
- Weed Prevention: Mulch helps to suppress the growth of weeds by blocking out sunlight. By blocking sunlight, mulch suppresses the growth of weeds which compete for nutrients and water. This can save you time and effort weeding your garden.
- Improved Soil Structure: Mulch helps to improve soil structure by breaking down organic matter and adding nutrients to the soil. This can make the soil more fertile and easier for plants to grow in.
Best mulching materials for Zone 7
There are many different mulching materials that can be used in Zone 7. Some of the best mulching materials for this zone include:
- Straw: A common choice for vegetable gardens, it’s lightweight, easy to spread, and not too expensive.
- Leaves: Shredded leaves are an abundant fall resource that decomposes over time, enriching the soil. They are a good choice for mulching because they are lightweight and easy to spread.
- Pine Needles: Perfect for acid-loving plants as they can slightly acidify the soil. Unless you’ve got a shedding pine tree in your yard, pine needles definitely cost a bit more than free grass clippings or leaves, but they are still a relatively affordable option.
- Wood/Bark Chips: These are long-lasting and provide a neat appearance but can take longer to break down. Wood chips are the most expensive option for mulching. Though, they are a good choice for mulching because they are durable and can last for several years.
- Compost: While it’s technically not a mulch, a thick layer of compost can serve a dual purpose, providing nutrients as well as regulating temperature. To save money, you can compost yourself, or in some areas you can get free compost from community gardens or from your local government. I get mine for free from the Holtsville Ecology Center on Long Island.
- Grass Clippings: Grass clippings are also a free mulch idea if you have a lawn. They decompose fast but are excellent for retaining moisture. Ensure they’re free from herbicides or pesticides. They are also a good choice for mulching because they are high in nitrogen and can help to improve soil quality.
How to apply mulch for optimal benefits
When applying mulch, it is important to follow these tips for optimal benefits:
- Preparation: Begin by weeding the area. This ensures that the mulch effectively suppresses new weeds.
- Thickness: Apply a 2 to 4-inch layer of mulch. If it’s too thin, it won’t retain moisture or suppress weeds effectively. But if it’s too thick, water might not reach the soil.
- Distance from Plants: Keep mulch a few inches away from plant stems. If you apply mulch directly against the stems of plants. This can cause the stems to rot. It will also discourage pests from attacking the plants.
- Replenish: Over time, organic mulches will break down, with some forms like grass clippings breaking down very fast. Replenish as needed to maintain the desired thickness.
- Watering: After applying mulch, water the area to moisten the mulch and help it settle in place.
Soil Management for Cold Weather
The benefits of no-till gardening in colder months.
No-till gardening is a great way to improve soil health in any climate, but it can be especially beneficial in cold weather. No-till gardening is essentially a method where you forgo the routine of turning the soil between seasons.
In Zone 7, adopting this technique during the colder months offers several advantages:
- Soil Structure Maintenance: By not tilling the soil, you help to preserve the beneficial microbes and fungi that live in the soil, leaving them undisturbed. These microbes help to aerate the soil, improve drainage, and increase nutrient availability.
- Moisture Retention: The soil retains more moisture since it’s not being constantly turned. This is crucial in colder months when moisture can evaporate quickly.
- Less Soil Erosion: Without frequent tilling, the soil is less susceptible to erosion during heavy fall rains or winds.
- Natural Mulch Creation: Over time, plant debris on the soil’s surface decomposes, acting as a natural mulch layer, insulating the soil against sudden cold snaps and adding important nutrients to the soil.
Using compost and organic matter to improve soil warmth and health.
Adding compost and organic matter to your garden during the colder months can definitely upgrade your Zone 7 gardening:
- Natural Insulation: Organic matter acts as an insulator, trapping warmth in the soil. This helps protect plant roots from sudden temperature drops.
- Improved Soil Structure: Compost introduces beneficial microbes that enhance soil fertility and structure. It also contains nutrients and food that are beneficial to the microbes and to your plants.
- Moisture Retention: Compost can absorb water and gradually release it to plants.
You can still incorporate compost into your soil while practicing no-till gardening by:
- Sheet Composting: Create a layer of compost on top of the soil and then covering it with a tarp or other material. The compost will break down and be absorbed by the soil over time.
- Top Dressing: You can simply apply compost as a top dressing, either by itself or with your mulch. Over time, worms and other soil organisms will help incorporate the compost into the soil below.
- “Tickling” the Soil: This is a cheat that’s like tilling, but not. Instead of deeply tilling the soil, you can “tickle” or lightly mix the compost into the top couple inches of soil using a garden fork or hand tool. This allows you to incorporate compost into the top few inches of soil without disturbing the beneficial microbes that live in the soil.
- Using a Broadfork: A broadfork is a special garden tool that allows you to aerate the soil without tilling it. Simply insert your broadfork into the soil and wiggle it back and forth to create channels. Once you’ve aerated with the broadfork, you can add compost to the top and water it in. The compost will gradually work its way into the channels. This is a good option for incorporating compost into deeper layers of soil without tilling.
Water Management in Colder Months
Understanding the role of water in plant protection against frost
In my early gardening days, I just assumed water plus cold equals ice, but water plays a surprising role in protecting plants against frost.
- Heat Storage: Water can actually help insulate plants against cold temperatures. It absorbs heat during the day and releases it slowly during the night. Soil that’s adequately moist can protect plants from early frosts by releasing this stored heat.
- Ice Prevents Freezing: What? Yes, really. When water freezes, it expands, creating a layer of insulation around the plant. This layer of insulation helps to prevent the plant’s tissues from freezing.
- Cell Strength: Plants that are well-watered have turgid cells, making them less susceptible to frost damage compared to dehydrated plants.
Tips for Winter Watering Schedules:
You won’t be following your July watering schedule when it gets cold out. Here are some pointers for planning your fall and winter watering schedules:
- Morning Watering: It’s best to water in the early morning so that the plants have time to absorb it during the day.
- Avoid Overhead Watering: Use drip irrigation or water at the base to prevent ice formation on plant surfaces.
- Check Moisture Levels: Before watering, check soil moisture a few inches deep. Overwatering can cause root rot, especially in cooler temperatures.
The Significance of Preventing Waterlogged Soil in Cold Weather:
Waterlogged soil can be just as harmful to plants as dry soil in cold weather. The colder weather makes this much easier to overlook since the summer heat isn’t evaporating the water as quickly. Avoid getting your soil waterlogged for:
- Root Health: Overly wet soil in cold weather can lead to root rot, damaging or killing plants.
- Oxygen Availability: Waterlogged soil deprives roots of oxygen, essential for plant health.
- Disease Promotion: Soggy conditions can be a breeding ground for fungal diseases.
Wind Protection for Zone 7 Gardens
winter winds can pose a serious risk to your garden. Just like mulching is crucial for temperature regulation, understanding wind protection is key for fall and winter success.
The role of windbreaks in protecting plants from cold winds.
Wind can be a major problem for plants in cold weather. It can desiccate plants, causing them to lose moisture and become both frail and more susceptible to frost damage. Wind can also break branches and knock over plants. You can use up windbreaks, both natural and artificial, to shield your garden:
- Natural Barricades: Trees, hedges, and shrubs can act as living walls, buffering and dispersing strong gusts. Planting these strategically around your garden can make the area wind-resistant while adding some nice greenery to the mix.
- Artificial Defenses: Items like burlap screens, fences, and temporary netting can be effective in blocking or redirecting harsh winds, especially in exposed areas.
Using natural and artificial windbreaks effectively.
The placement of plants and garden structures plays a pivotal role in shielding your garden from unwelcome breezes:
- Staggered Planting: Design your garden so that taller plants shield smaller, more vulnerable ones. Think of it as a tiered defense.
- Location: If possible, position your most sensitive plants in areas naturally sheltered from prevailing winds, such as near walls, fences, or buildings.
- Container Plants: Their mobility allows you to adjust plant positions as seasons shift, or even move them indoors during particularly cold snaps.
Efficient Use of Windbreaks
To make the most of your wind protection efforts, it’s important to keep in mind:
- Height Matters: For a windbreak to be effective, it needs to be tall enough to shield the plants behind it. As a general rule of thumb, the protection zone usually extends to about 10 times the height of the windbreak.
- Density: Completely solid barriers can deflect wind, but they might also unintentionally create turbulence or swirling patterns of wind on their opposite side, aka turbulent eddies. A semi-permeable windbreak, like a hedge or a burlap screen, will filter and slow the wind without causing as much turbulence.
- Maintenance: Natural windbreaks, like hedges, need to be pruned to maintain their efficiency. Artificial barriers should be checked for wear and tear and replaced when necessary.
Additional Tips to Protect Plants from Wind
- Mulch Around Plants: I know, I know…I brought up mulch AGAIN. In addition to all of the benefits I’ve mentioned before, mulch also helps to insulate plants and protect them from wind damage. Apply a 2- to 4-inch layer of mulch around your plants.
- Water Plants Regularly: Watering plants regularly helps to keep them hydrated and less susceptible to wind damage.
- Protect Tender Plants: If you have tender plants that are susceptible to wind damage, you may want to cover them with a tarp or other protective covering during cold weather.
- Position Plants Strategically. When planting, consider the direction of the prevailing winds and position plants in sheltered areas. You can also plant tall plants on the north and west sides of your garden to block the wind.
- Use a Variety of Plants: Varying the types of plants in your garden will provide more protection than a single type of plant. Since different plants have different shapes and sizes, it naturally helps to break up the wind.
Use Greenhouses in Zone 7
A greenhouse can definitely be a big investment for your garden, but they can be a great way to extend the growing season in Zone 7, on both sides of the frost! Greenhouses can help to moderate temperature extremes, making it possible to grow a wider variety of plants.
Benefits of using greenhouses in Zone 7
- Extended Growing Season: Greenhouses provide protection against early frosts and unpredictable cold snaps. They can help extend the growing season by several weeks in the spring and fall, so you can start planting earlier in the spring and harvest later in the fall.
- Controlled Environment: Unlike the open garden, a greenhouse let you somewhat control the climate. You can manage humidity, temperature, and light levels, ensuring optimal conditions for your plants throughout the year.
- Protection from Pests and Diseases: The enclosed environment of a greenhouse can deter many pests, reducing the need for chemical pesticides, or going outside to see your poor tomato plants eaten up by aphids ☹
- Protection from the Elements: Greenhouses protect plants from the harsh elements of weather, such as cold, wind, and rain. This can help to prevent crop damage and extend the lifespan of plants.
- Versatility: With a greenhouse, you can grow a wider variety of plants, including those that aren’t typically suited to the Zone 7 climate. Tropical plants or those needing a more consistent environment can thrive here.
- Conservation of Water: The contained environment of a greenhouse can lead to reduced water evaporation, allowing for more efficient water usage.
- Increased Yields: Greenhouses can help to increase yields by providing a more ideal growing environment for plants.
Considerations for selecting the right greenhouse size and type
When selecting a greenhouse for Zone 7, there are a few things to keep in mind:
- Your Garden Goals: First think about what you want from your greenhouse. If you’re looking to extend the season for just a few plants, a smaller greenhouse might suffice. But if you want a year-round growing space for various plants, you might need something bigger.
- Size: The size of the greenhouse will depend on the amount of space you have available and the number of plants you want to grow. If you just want to go big, you should think for a second and first assess the space you have available. While a large greenhouse can host more plants, it also requires more ground space and can cast shade on other parts of your garden.
- Budget: You can find greenhouses in a wide range of prices, from simple and affordable greenhouse shelves to high-end with all every greenhouse luxury. Decide on a budget beforehand to guide your selection, otherwise you might get too excited about some of the special features you didn’t really need.
- Material: The materials used in the greenhouse will affect its durability, insulation, and price. Common greenhouse materials include polycarbonate, polyethylene, and glass. Each has its advantages and disadvantages, which I’ll be sure to cover later for you.
- Location: The location of the greenhouse is important. It should be in a sunny spot that is protected from the wind.
- Ventilation: Greenhouses can heat up, A LOT. Adequate ventilation is crucial for preventing overheating and also for providing fresh air to your plants. Ensure the greenhouse you choose has adjustable vents or windows.
Tips for greenhouse maintenance and plant care
- Regular Cleaning: Keep the glass or plastic clean to ensure maximum light penetration. This makes sure your plants get enough sunlight for photosynthesis. While cleaning, inspect the greenhouse for any damages as well.
- Monitor Temperature: Use a thermometer to keep track and consider investing in a heating system for colder months.
- Watering: Remember that greenhouses can create a more humid environment, which might reduce the need for frequent watering. You should always check the soil moisture levels before watering. Try to water early in the day to reduce humidity at night.
- Temperature Control: During the height of summer, the greenhouse can easily get too hot for plants to survive. Consider installing shade cloths to protect your plants from excessive heat. Also make sure you are opening the vents or doors on a regular basis
- Inspect for Pests: A major benefit of greenhouses is that they can deter many pests, but they’re not entirely immune. Regularly inspect your plants for signs of pest activity and take action ASAP.
- Rotation: If you’re growing food crops, consider rotating them to prevent soil-borne diseases and manage nutrients in the soil.
A greenhouse is one of the best ways to extend a zone 7 growing season, offering protection and a controlled environment for your plants. With the right care and maintenance, your greenhouse can be a productive gardening space year-round.
Grow Winter Vegetables and Cold-Hardy Varieties
Just because the cooler season is approaching, it doesn’t mean you have to say goodbye to fresh homegrown produce. There are plenty of vegetables that actually thrive in colder temperatures.
List of vegetables that thrive in colder temperatures
Remember, these are general guidelines for Zone 7. Always consider your personal microclimate, specific varieties of veggies, and local conditions when making planting decisions. You can start planting vegetables in August up until November for some plants like garlic, spinach, and kale.
Kale
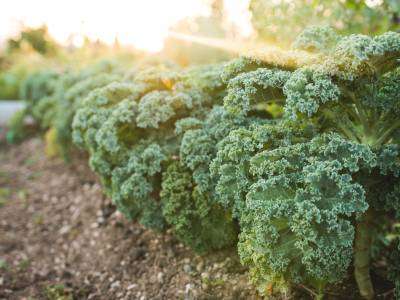
Great for salads, smoothies, and crisping up for a snack. This nutrient-rich leafy green becomes sweeter after a frost. It is a good source of vitamins A, C, and K, and it can be eaten raw or cooked.
- When to Plant: Late summer for a fall/winter harvest.
- Estimated Last Date: Early October
- Time to Harvest: 50-70 days.
- Cold Hardiness: Can tolerate down to 20°F.
- Tips: This nutrient-rich leafy green becomes sweeter after a frost. Start outdoors directly in the soil.
Brussels Sprouts

They improve in flavor after experiencing some cold.
- When to Plant: Mid-summer for fall harvest.
- Estimated Last Date: Late July
- Time to Harvest: 90-100 days.
- Cold Hardiness: Can tolerate down to 20°F.
- Tips: Best started outdoors. They improve in flavor after experiencing some cold.
Carrots
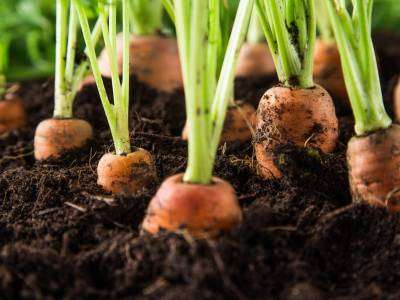
Cold weather can turn them even sweeter and crunchier. They can be grown in the fall or a spring and a god source of vitamin A that can be stored for several months.
- When to Plant: 10-12 weeks before the first expected frost.
- Estimated Last Date: Early September
- Time to Harvest: 50-75 days.
- Cold Hardiness: Can tolerate down to 15°F.
- Tips: Direct sow seeds outdoors. Cold weather can turn them even sweeter and crunchier.
Broccoli
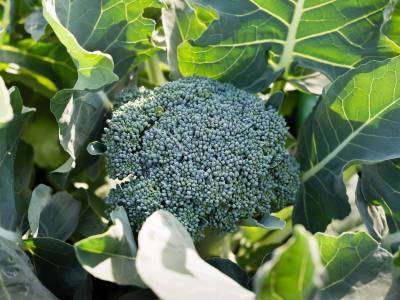
It produces side shoots which can be harvested throughout winter for several weeks. Broccoli is a good source of vitamins C and K.
- When to Plant: Late summer.
- Estimated Last Date: Early October
- Time to Harvest: 85-100 days.
- Cold Hardiness: Can tolerate down to 25°F.
- Tips: Direct sow outdoors or start indoors and transplant. Produces side shoots which can be harvested throughout winter.
Garlic
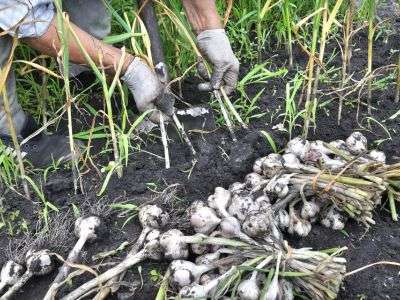
Garlic is traditionally planted in the fall, allowing it to establish roots before the winter freeze. It requires a period of cold dormancy to develop its bulbs properly.
- When to Plant: Late October to November.
- Estimated Last Date: Mid-November
- Time to Harvest: 8-9 months (the following summer)
- Cold Hardiness: Can overwinter without issues in Zone 7
- Tips:
- Choose between hardneck and softneck varieties. Plant individual cloves, pointy end up, about 2 inches deep. Cover with a layer of straw or mulch after planting. Garlic takes a longggg time to grow, so plan accordingly. I’ve made the mistake of filling a garden bed with it in the past, meaning I couldn’t put anything else in there in the spring while I waited until July to harvest the garlic.
Cabbage

Various varieties can thrive in the chill, including Savoy and Red cabbage. It’s also fairly easy to grow and a good source of fiber and vitamin C that can be stored for several months.
- When to Plant: 6-8 weeks before the first frost.
- Estimated Last Date: Early September
- Time to Harvest: 80-180 days depending on variety.
- Cold Hardiness: Can tolerate down to 20°F.
- Tips: Direct sow outdoors or start indoors and transplant. Various varieties can thrive in the chill, including Savoy and Red cabbage.
Swiss Chard
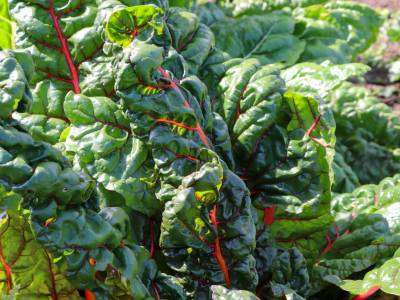
With its vibrant stalks, chard can endure cooler weather.
- When to Plant: 6-8 weeks before the first frost.
- Estimated Last Date: Early September
- Time to Harvest: 80-180 days depending on variety.
- Cold Hardiness: Can tolerate down to 20°F.
- Tips: Direct sow outdoors or start indoors and transplant. Various varieties can thrive in the chill, including Savoy and Red cabbage.
Leeks
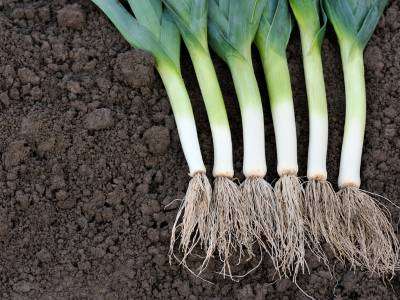
They can be harvested even from frozen ground.
- When to Plant: Late summer.
- Estimated Last Date: Early October
- Time to Harvest: 85-105 days.
- Cold Hardiness: Can tolerate down to 20°F.
- Tips: Direct sow seeds outdoors. Harvest even from frozen ground.
Parsnips
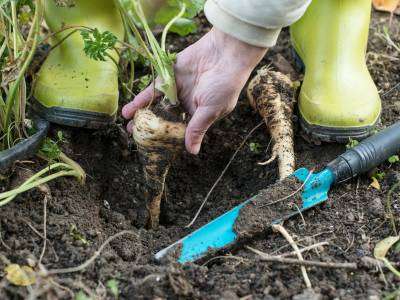
Like carrots, they sweeten after a frost.
- When to Plant: Late summer.
- Estimated Last Date: Early September
- Time to Harvest: 100-120 days.
- Cold Hardiness: Can tolerate down to 20°F.
- Tips: Direct sow seeds outdoors. Like carrots, they sweeten after a frost.
Collard Greens

These are both cold-tolerant and packed with nutrients.
- When to Plant: Late summer.
- Estimated Last Date: Early September
- Time to Harvest: 100-120 days.
- Cold Hardiness: Can tolerate down to 20°F.
- Tips: Direct sow seeds outdoors. Like carrots, they sweeten after a frost.
Cauliflower

Cauliflower is a cool-season crop that is similar to broccoli. It is a good source of vitamin C and fiber.
- When to Plant: Late summer.
- Estimated Last Date: Early October
- Time to Harvest: 55-100 days.
- Cold Hardiness: Can tolerate down to 25°F.
- Tips: Direct sow outdoors or start indoors and transplant. Similar to broccoli in care.
Lettuce
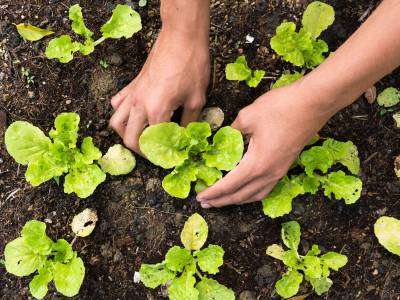
Lettuce is a cool-season crop that is easy to grow, and it can be harvested pretty quickly after planting. It is a good source of vitamins A and K, and it can be eaten raw or cooked. Lettuce can be grown in the fall or spring, and it can be harvested throughout the winter.
- When to Plant: Late summer to early fall.
- Estimated Last Date: Mid October
- Time to Harvest: 30-60 days.
- Cold Hardiness: Can tolerate down to 25°F.
- Tips: Direct sow outdoors. Harvest can continue even after light frost.
Onions
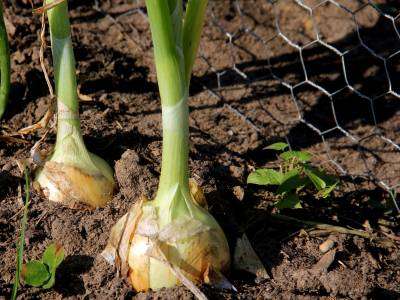
Onions are a cool-season crop that can be stored for several months. They are a good source of vitamins C and B6.
- When to Plant: Fall for overwintering varieties.
- Estimated Last Date: Late September
- Time to Harvest: Depends on variety, typically 100-120 days.
- Cold Hardiness: Bulbing varieties can tolerate down to 20°F.
- Tips: Direct sow outdoors. Onions started in the fall will be ready earlier the next year.
Peas

Peas are a cool-season crop that can be planted in the fall or early spring. They are a good source of protein and fiber, and they can be eaten fresh or frozen.
- When to Plant: Fall for overwintering varieties.
- Estimated Last Date: Late September
- Time to Harvest: Depends on variety, typically 100-120 days.
- Cold Hardiness: Bulbing varieties can tolerate down to 20°F.
- Tips: Direct sow outdoors. Onions started in the fall will be ready earlier the next year.
Spinach
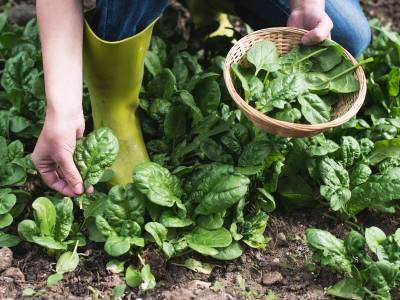
Spinach is a cool-season crop that is packed with nutrients. It is a good source of vitamins A, C, and K, and it can be eaten raw or cooked. Spinach can be grown in the fall or spring, and it can be harvested throughout the winter. It grows as fast, and often faster than lettuce.
- When to Plant: Late summer for fall harvest.
- Estimated Last Date: Early October
- Time to Harvest: 37-45 days.
- Cold Hardiness: Can tolerate down to 20°F.
- Tips: Direct sow outdoors. Grows as fast, and often faster than lettuce.
Potatoes
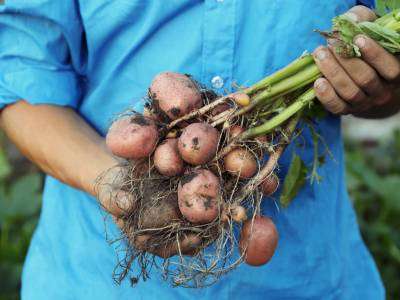
Potatoes are a cool-season crop that can be stored for several months. They are a good source of carbohydrates and potassium, and they make…French fries!
- When to Plant: Early summer for fall harvest.
- Estimated Last Date: Late June
- Time to Harvest: 90-120 days.
- Cold Hardiness: Can tolerate down to light frost, but tubers in the ground can be damaged by prolonged freezing temperatures.
- Tips: Plant tubers directly outdoors. Harvest before the ground freezes for winter storage.
Turnips
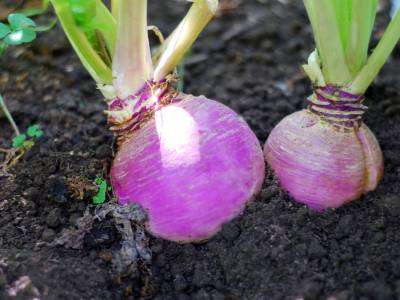
Both the roots and greens of turnips are edible. It matures quickly and can be mulched for overwintering.
- When to Plant: Late summer for a fall harvest.
- Estimated Last Date: Late September
- Time to Harvest: 30-60 days.
- Cold Hardiness: Can tolerate down to 20°F.
- Tips: Direct sow seeds outdoors. They mature quickly and can be mulched for overwintering.
Radishes
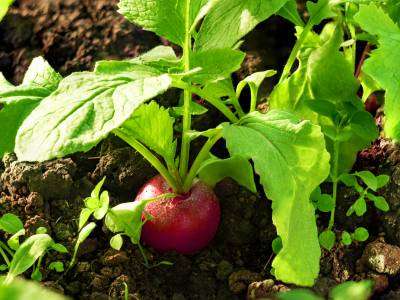
Mature very quickly and can bring a spicy crunch to salads.
- When to Plant: Late summer to early fall.
- Estimated Last Date: Mid-October
- Time to Harvest: 21-30 days.
- Cold Hardiness: Can tolerate down to 20°F.
- Tips: Direct sow outdoors. They’re a fast-growing crop ideal for succession planting.
Beets
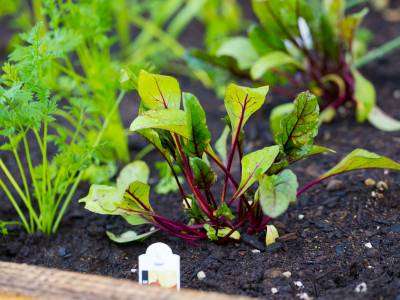
Both the roots and greens are edible, with the roots adding a sweet, earthy flavor to dishes.
- When to Plant: 8-10 weeks before the first frost.
- Estimated Last Date: Early September
- Time to Harvest: 50-70 days.
- Cold Hardiness: Can tolerate down to 20°F.
- Tips: Direct sow seeds outdoors. They can be mulched to extend the harvest into winter.
Rutabagas
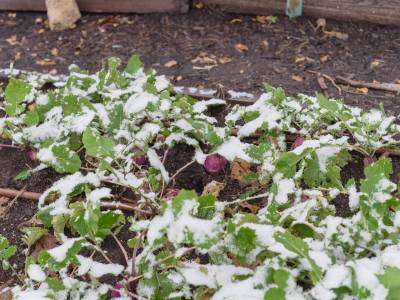
A close relative of turnips but typically have a sweeter flavor.
- When to Plant: Late summer.
- Estimated Last Date: Early September
- Time to Harvest: 90-100 days.
- Cold Hardiness: Can tolerate down to 20°F.
- Tips: Direct sow outdoors. They can be mulched for extended winter harvest.
Kohlrabi
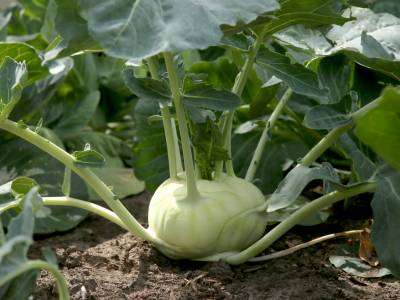
This unique vegetable has a crisp texture similar to broccoli stems and is rich in nutrients.
- When to Plant: Late summer.
- Estimated Last Date: Late September
- Time to Harvest: 50-60 days.
- Cold Hardiness: Can tolerate down to 15°F.
- Tips: Direct sow seeds outdoors or start indoors and transplant. Harvest before they get too large to maintain a tender texture.
Arugula
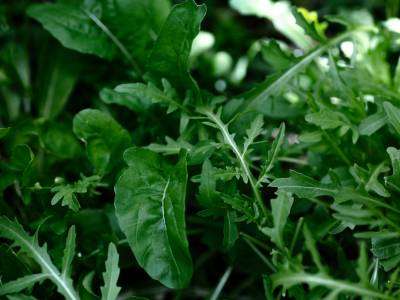
A spicy, peppery salad green that can grow in cooler temperatures.
- When to Plant: Late summer to early fall.
- Estimated Last Date: Mid-October
- Time to Harvest: 30-40 days.
- Cold Hardiness: Can tolerate down to 20°F.
- Tips: Direct sow outdoors. Arugula can be cut back often and will come again, providing multiple harvests from a single planting.
Mustard Greens
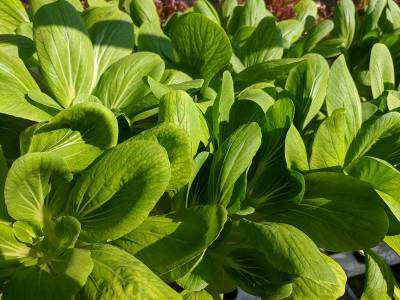
Spicy greens that can spice up your salads or can be cooked to mellow their bite.
- When to Plant: Late summer.
- Estimated Last Date: Early October
- Time to Harvest: 30-45 days.
- Cold Hardiness: Can tolerate down to 20°F.
- Tips: Direct sow outdoors. Regularly harvesting will encourage new growth.
Endive & Escarole
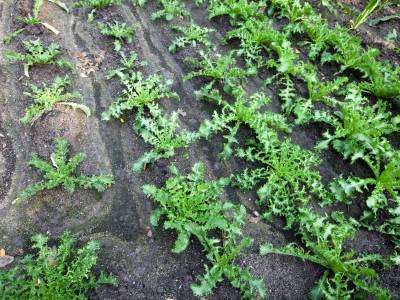
These bitter greens add a unique flavor profile to salads.
- When to Plant: Late summer.
- Estimated Last Date: Early October
- Time to Harvest: 85-100 days.
- Cold Hardiness: Can tolerate down to 15°F.
- Tips: Direct sow outdoors or start indoors and transplant. They can be blanched to reduce bitterness.
Mache (Corn Salad)
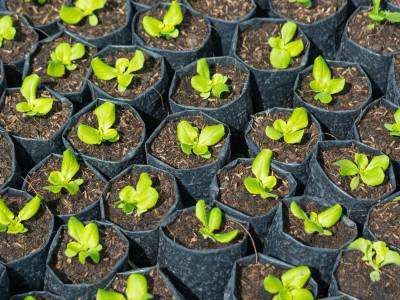
A hardy green often grown in cooler seasons.
- When to Plant: Early to mid-fall.
- Estimated Last Date: Late October
- Time to Harvest: 50-60 days.
- Cold Hardiness: Can tolerate down to 20°F.
- Tips: Direct sow outdoors. This low-growing plant can benefit from some protection, like row covers.
Raspberries (Certain Varieties)
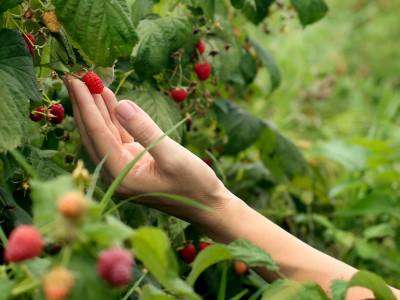
Traditionally a summer fruit, but some fall-bearing varieties can provide a late-season harvest.
- When to Plant: Late winter to early spring.
- Estimated Last Date: N/A (for fall-bearing, planting is done in early spring)
- Time to Harvest: Depending on the variety, from summer to fall.
- Cold Hardiness: Can tolerate down to 0°F, but winter protection is beneficial.
- Tips: Choose fall-bearing or ever-bearing varieties for late-season harvests. Provide support with trellises.
Strawberries (Ever-bearing or Day-neutral Varieties)
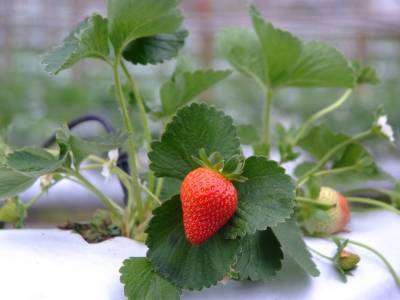
Can produce fruit from spring to fall.
- When to Plant: Early spring.
- Estimated Last Date: N/A (planting is primarily done in spring)
- Time to Harvest: Varies, but can produce from spring to fall.
- Cold Hardiness: Can tolerate down to 10°F with mulching.
- Tips: Choose ever-bearing or day-neutral varieties for extended harvests. Mulch your strawberris to protect crowns in winter.
Tips for sowing, growing, and harvesting winter crops
- Sow Early: Most winter vegetables need to be sown in late summer or early fall to allow them sufficient time to mature before the coldest weather hits. Winter crops should be sown when the soil temperature is cool but not freezing.
- Mulch: As mentioned above, applying a thick layer of mulch can protect the soil and roots from extreme cold and regulate soil temperature.
- Watering: Ensure you water your plants in the morning, allowing them to absorb what they need before temperatures drop in the evening. This is especially important when nighttime temperatures drop below freezing.
- Protection from the Elements: Consider using row covers or cold frames for added protection against frost and extremely cold temperatures.
- Protection from pests and diseases: Just because you’re seeing less pests in the colder weather, doesn’t mean there is nothing out there to attack your plants. Winter crops can still be susceptible to pests and diseases, so it is important to inspect them regularly and take steps to control pests and diseases as soon as they are detected.
- Spacing: Ensure adequate spacing between plants. This prevents diseases and allows for good air circulation.
- Harvest as Needed: Many winter vegetables can be harvested gradually to allow the plant to continue producing. For example, you can pick the outer leaves from vegetable plants like kale and chard, which will continue to grow back for more harvests.
- Monitor Weather: Keep an eye on your local weather forecast. If extremely cold weather is predicted, consider harvesting vulnerable crops ahead of time.
- Fertilize Monthly: Winter crops benefit from monthly fertilization with a balanced fertilizer.
Benefits of including cold-hardy varieties in your garden
It’s a bummer that you can’t grow a full summer garden in late fall or winter, but there are many benefits to starting a winter garden:
- Extended Harvest: Growing cold-hardy vegetables allows for fresh produce well into the winter months. This way you can have fresh, homegrown produce all winter long!
- More Productive Plants: Because cold-hardy varieties can be grown in colder climates, they can often produce more crops than warm-season crops. This is because they have a longer growing season. For example, in Zone 7, the average growing season for warm-season crops is about 3 months, but the average growing season for cold-hardy crops is about 6 months.
- Improved Flavor: Many winter vegetables develop a sweeter taste after exposure to frost, like carrots, brussels sprouts, cabbage, and peas.
- Nutrient-Rich: Vegetables like kale and collard greens are packed with vitamins and minerals, making them a healthy choice for winter consumption. You’ll just have to change up your winter recipes a bit.
- Soil Protection: Winter crops can help protect soil from erosion and nutrient loss during the colder months, keeping your garden in tiptop shape when it comes time to plant your spring garden.
- Pest Deterrence: Most pests are less active in colder months, making it easier to maintain these crops. Many cold-hardy varieties are more tolerant of pests and diseases than summer veggies.
- Save Money: Yeah, this goes with the extended harvest point, but it’s worth noting that you can save a good amount of money on groceries if you just have to go out to your yard for your food, or even just a few ingredients. For me, personally, I always get bummed out about how much I spend on setting up and building up my garden in the spring and summer, so it’s nice to know the cost reaches further this way.
Winter vegetables are a great way to extend your harvest and enjoy fresh, homegrown produce all year long. In this section, we discussed some of the most popular cold-hardy vegetables, as well as tips for growing and harvesting them. Feel free to leave a comment here with your favorite winter crops and any tips you might have for a lush and productive winter garden.
Start Seeds Indoors
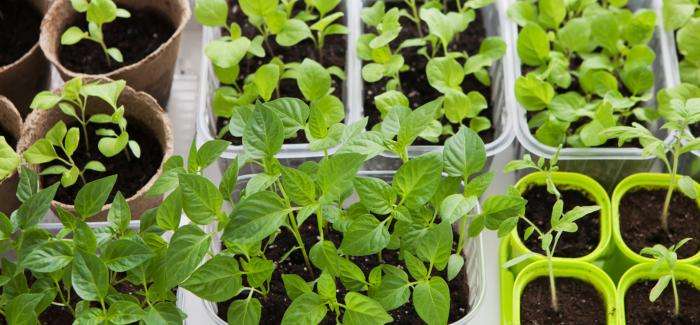
Starting seeds indoors is a great way to get a head start on the growing season. It can also help to establish your plants roots and stem structure, and protect your plants from late frosts and unpredictable weather patterns.
Why Start Seeds Indoors?
Starting your seeds indoors is a bit like nurturing younglings in a protective cocoon. Here are the compelling reasons:
- Weather Shielding: Unpredictable late frosts and temperature swings in Zone 7 can ruin for young plants before they get a chance to thrive. Starting indoors shields your plants from these abrupt cold snaps.
- Sturdy Beginnings: Plants that begin life indoors tend to be stronger and more vigorous than seedlings that are started outdoors. Starting your seeds indoors can establish stronger initial growth, setting them up for a healthier lifecycle.
Choosing the Right Containers
There are a lot of options for containers to start your seeds. Here are a few of the best ones I recommend:
- Peat Pots: Biodegradable and eco-friendly, peat pots can be planted directly into the garden. However, they can sometimes dry out quickly so make sure to check on these every day.
- Plastic Trays: Reusable and cost-effective, plastic trays are a popular choice. Don’t make the mistake I did last year…make sure they have drainage holes to prevent overwatering.
- Biodegradable Containers: Materials like coconut coir or DIY newspaper seedling containers can be used to create pots that, like peat pots, can be planted directly. They’re also eco-friendly but can also dry out pretty fast like peat pots.
- Jiffy Seed Starters: Some gardeners like to talk trash about these, but I’m a huge fan. I started using the Jiffy Seed pellets this past spring, and I had a lot of luck starting most of my seeds.
Soil and Watering
It is important to use a sterile seed starting mix when starting seeds indoors. This should be pathogen free and will help to prevent diseases like damping off. The soil should also be kept moist but not soggy. You can water your baby seedlings with a spray bottle or, as I usually do, bottom water.
Lighting and Temperature
Most seedlings* need at least 6 hours of sunlight per day. Just as we need food and warmth, so do our plant babies, but they get that from light.
*Always check your seed packets for recommended light and temperature as not all plants are the same in this respect.
- Light them Up: Seedlings crave light. Not enough light, and they’ll get leggy and weak. Try to give them 12-16 hours of light, preferably from a grow light. You don’t need anything fancy here. I have a couple of these grow lights and they’re awesome!
- Temperature: Each variety of seed has its comfort zone. You’ll find that most prefer a cozy 65-75°F for germination, but you always check the specific needs of what you’re planting. If your house gets cold while you’re out at work during the day, the top of your fridge might be a bit warmer than the rest of your house.
Transplanting Seedlings in the Cold Season
Time to get those little ones in the ground!
- Wait for it…: Don’t just go putting your seedlings in the garden once they pop through the soil. Give them a chance to develop a sturdy set of true leaves and build up some resilience. It’s also crucial that you harden them off first…
- Steady Hardening Off: Before you actually plant your seedlings, they need to be hardened off so they get acclimated to the outside weather and bright sun. Start by placing them in a sheltered spot outdoors for a few hours each day. Gradually increase sun and temperature exposure over a week to ease the transition before planting them.
- Easy Does It: When transplanting in Zone 7, make sure you minimize root disturbance with your seedlings. Handle seedlings by leaves and and set them into their new space with care
Bring Your Garden Inside – How to Move Your Plants Indoors
When it starts getting cold out, it’s going to be tough to say goodbye to all of the plants you’ve tended to in your garden all summer long.
Why Move Plants Indoors?
There are three main reasons to move plants indoors:
- Frost Defense: Even a light frost can damage or kill sensitive plants. Bringing them indoors shields them from potentially damaging frost and freeze.
- Extended Life: Why let your annuals fade away in the cold weather when they can brighten your home for a few more weeks or even months? Plus, certain perennials can be overwintered indoors to make a return the next season.
- Extra Crops: You probably won’t be able to bring your whole raised garden bed indoors, but certain plants can be brought inside to eke out a few extra harvests from. For example, the easiest move would be to bring potted herbs indoors to continue harvesting from throughout the winter.
Selecting Suitable Plants
Sadly, not all plants are ideal for moving indoors. Consider the plant’s size, light requirements, and temperament. Some plants thrive indoors, while others just won’t make it. A few plants that you can take indoors that can still thrive:
- Veggie Garden: peppers, tomatoes (small varieties), kale, lettuce, chard, green onions, spinach, arugula, radishes, beets
- Fruits: strawberries (alpine varieties), blueberries (dwarf varieties), grapes (dwarf varieties)
- Fruit trees: fig (dwarf varieties), lemon (dwarf varieties), kaffir lime, olive (small varieties)
- Herbs: chives, parsley, rosemary, lemon verbena, basil, mint, thyme, oregano, sage, tarragon
- Annuals/Biennials: geraniums, impatiens, nasturtiums, pansies, marigolds, zinnias, snapdragons, petunias, African violet, spider plant
- Perennials: begonias, aloe vera, hibiscus, ferns, orchids, Christmas cactus, peace lily
*You aren’t going to want to dig up plants to come inside. It’s best to just bring in plants in moveable containers.
Preparations Before Moving
- Pest Check: Before you bring any of your plants indoors, inspect them meticulously for freeloading pests or signs of disease. The last thing you want is for one sick plant to infect your entire indoor garden or to wind up with a bug problem indoors.
- Prune and Prep: Remove dead or yellowing leaves to prevent bringing in pests and diseases.
- Watering: Water your plants thoroughly before moving them indoors. This will help to reduce transplant shock.
Creating an Indoor Environment
Once your plants are indoors, you need to create an environment that suitable to their needs.
- Lighting: Your plants are used to getting a full dose of sun every day, so now they need a replacement to survive. Most plants need at least 6 hours of sunlight per day. A sunny windowsill is ideal, but if you don’t have a lot of natural light in your home, you can use grow lights instead.
- Temperature: The ideal temperature for most plants is between 65 and 75 degrees Fahrenheit. If it’s too cold or too hot in your house, you might need to use a heater or air conditioner to get the right temperature.
- Humidity: Indoor heating can really dry out the air, which is not a good thing since most plants thrive in humid air. If your place is dry, set up a humidifier near the plants.
Additional Resources
If my rambling here wasn’t enough for you, below are some great resources for your Zone 7 Gardening.
- Useful Tools & Apps:
- PictureThis: An app that helps identify plant, but more importantly, if you send a picture of sick part your plants, you’ll get problem causes and treatment suggestions.
- Gardenize: Identify plants and add them directly to your digital garden
- Frost Date Calculator: Enter your ZIP code to find out the estimated first and last frost dates for your area – essential for Zone 7 gardeners.
- Informative Websites:
- USDA Plant Hardiness Zone Map: The definitive guide to zones in the U.S., including detailed maps and plant suggestions.
- Garden.org: A rich resource of articles, Q&A, and plant databases catered to all zones, including Zone 7.
- The Old Farmer’s Almanac: This website and app provide a wealth of information on gardening, including planting calendars, weather forecasts, and gardening tips.
- Book Recommendations:
- “The Vegetable Gardener’s Bible” by Edward C. Smith: A comprehensive guide covering everything from soil prep to harvest.
- “The Year-Round Vegetable Gardener” by Niki Jabbour: Tailored advice for extending the growing season, which is especially valuable for Zone 7 gardeners.
- Courses for In-depth Learning:
- MasterClass with Ron Finley: Dive deep into gardening techniques with the self-proclaimed “Gangster Gardener”.
- Udemy’s Organic Gardening Course: Comprehensive course covering the basics and nuances of organic gardening.
Zone 7 gardeners have a ton of great opportunities to extend their growing season. Whether it’s through greenhouses, planting winter vegetables, or moving plants indoors, the possibilities are endless. Remember, every garden is unique, so find what works best with yours. Got a tip or story to share? Drop a comment below!
Also…I’m not sure if I said this before, but mulch is always a good idea 😉


