

A few years ago, I had some extra garlic on my counter that was starting to sprout. Instead of throwing it out and wasting it, I decided to just plant it in my garden where I had some extra space. When spring came around, I was amazed at how many of the garlic plants were thriving.
Before learning how easy it is to grow garlic at home, it was one of the things I’d buy from the grocery store pretty much every week that I’d go shopping. Garlic is a versatile and flavorful ingredient that is used in so many recipes. It is also a powerhouse of nutrients, with anti-inflammatory, antioxidant, and antimicrobial properties. Growing your own garlic at home is a rewarding experience, and it is especially rewarding in Zone 7, where the climate is ideal for garlic cultivation.
If you’re interested in growing your own garlic, Zone 7 is a great place to do it. Garlic is a relatively easy crop to grow, and it can be grown in a variety of climates. However, it is important to choose the right variety of garlic for your zone and to plant it at the right time of year.
This guide will provide you with all the information you need to know to successfully grow garlic in Zone 7. We will cover the different types of garlic, the best time to plant, how to prepare your soil, and how to care for your crop. We will also provide some tips on harvesting and using your garlic.
Understanding and Choosing the Right Garlic Variety for Zone 7
Garlic comes in two basic types: softneck and hardneck. The “neck” of a garlic bulb is the part of the bulb that connects the cloves to the roots. In softneck garlic, the neck is soft and flexible. In hardneck garlic, it is hard and woody.
The difference in neck texture is due to the different ways that softneck and hardneck garlic grow. Softneck garlic grows in a single layer around the neck, while hardneck garlic grows in multiple layers around the neck. The multiple layers of cloves in hardneck garlic create a harder neck.
Softneck Garlic:

- Does not produce a flower stalk
- Forms layers of cloves around a soft central core
- Softneck garlic bulbs are generally larger than hardneck varieties, with more cloves per bulb
- Has the longest shelf life
- Is the most common type found in the supermarket in the United States
- Is also the type to grow if you want to make garlic braids
- Most varieties are suited to areas of mild winters
- Inchelium Red, Red Toch, New York White Neck, and Idaho Silverskin are suitable for zone 7
- Avoid planting Creole types, as they are not winter hardy and do not store for any length of time
Hardneck Garlic:

- Has a hard flower stalk around which fewer but larger cloves huddle
- Is hardier than softneck garlic
- Is an excellent choice for zone 7 and colder regions
- Tend to have a more complex and robust flavor compared to softneck types
- Produces curly green stalks known as scapes. These scapes, if not removed, will form a flower head
- Is divided into three main types: purple stripe, rocambole, and porcelain
- Good choices of hardneck garlic plants for growing in zone 7: German Extra Hardy, Chesnok Red, Music, and Spanish Roja
Elephant Garlic
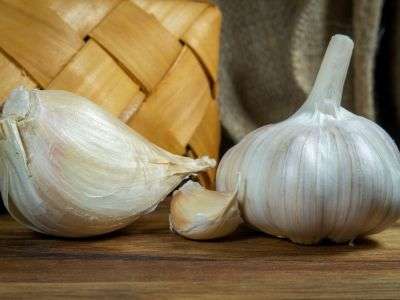
Elephant garlic is a member of the allium family, but it is not a true garlic. I just figured I would mention it to It is more closely related to leeks than it is to traditional garlic. However, its massive bulbs and milder flavor make it a favorite among many gardeners.
It’s worth noting that while it thrives in Zone 7, it might not produce as large bulbs in warmer zones that elephant garlic is known for.
Check out the picture here showing the size difference between the elephant garlic and a regular softneck garlic clove variety.
When choosing a variety of garlic to grow in Zone 7, it is important to consider the following factors:
- Climate: Hardneck garlic is more tolerant of cold weather than softneck garlic. If you live in a colder region of Zone 7, you may want to choose a hardneck variety of garlic.
- Soil: Garlic needs well-drained soil. If your soil is heavy clay, you may need to amend it with sand or compost to improve drainage.
- Taste: Softneck garlic has a milder flavor than hardneck garlic. If you prefer a stronger and more complex garlic flavor, you may want to choose a hardneck variety.
The Best Time to Plant Garlic in Zone 7:
Timing is crucial when planting garlic, especially in Zone 7, where the climate can offer both challenges and advantages.
Fall Planting
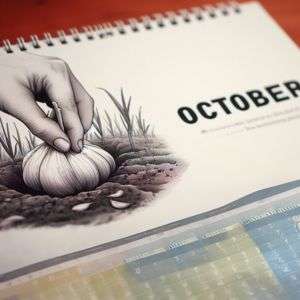
The majority of gardeners in Zone 7 prefer fall planting, typically in October. Planting in the fall allows the garlic to establish roots before winter, leading to larger bulbs when it comes time to harvest. The cold winter months help in the vernalization of garlic. That’s a big word for the process the garlic goes through when it creates bulbs when it is exposed to cold temperatures. If a garlic plant doesn’t go through vernalization, it will not produce bulbs. Instead, it will produce a single, large clove.
A general guideline for Zone 7 gardeners is to have the garlic planted by October 15th. However, depending on whether you’re in zone 7a or 7b, this timing can vary by a few weeks. For example, if you’re gardening in western North Carolina, a mid-September planting is ideal. On the other hand, if you’re in eastern North Carolina you can extend your planting window up to November.
Spring Planting
If you missed the fall window, you can still grow garlic, but it isn’t ideal. You’ll end up with much smaller bulbs than if you planted your garlic in October or November. Spring garlic is still useful, though. It is like the garlic equivalent to scallions and the smaller bulbs are still packed with flavor.
Tricking Mother Nature – Vernalize Garlic in the Refrigerator
You can actually trigger garlic vernalization using a refrigerator, a common practice among gardeners who might have missed the fall planting window or those living in warmer climates where natural vernalization is more difficult.
Here’s how you can vernalize garlic using a refrigerator:
- Selecting Cloves: Start by choosing healthy, disease-free garlic cloves for planting.
- Preparation: Place the garlic cloves in a breathable bag, like a mesh or paper bag. Some gardeners also use a container filled with slightly damp potting soil or peat moss to mimic soil conditions.*
- Refrigeration: Store the bag or container in the refrigerator. The garlic cloves need a cold treatment for at least 4-6 weeks. The temperature should ideally be between 32°F (0°C) and 50°F (10°C).
- Monitor: Check periodically to make sure the cloves aren’t rotting or sprouting prematurely. If you see any mold or rot, remove the affected cloves immediately.
- Planting: After the vernalization process, you can plant the garlic cloves in early spring. They should be ready to grow and will have received the cold exposure they need to produce bulbs.
There aren’t really any visual indications that the bulbs have completely gone through the vernalization process, but the 4-6 weeks in the fridge should be enough to trigger it.
Preparing to Grow Garlic in Zone 7
When and where to plant garlic in zone 7:
As I mentioned earlier, the best time to plant garlic in Zone 7 is in the fall, typically in October. If you miss the fall planting window, you can still plant garlic in the spring, but your bulbs will be smaller.
Garlic prefers full sun, so choose a location in your garden that receives at least 6-8 hours of direct sunlight daily. Garlic doesn’t like to sit in water, so avoid planting in areas that are prone to flooding or waterlogging.
Soil Preparation:
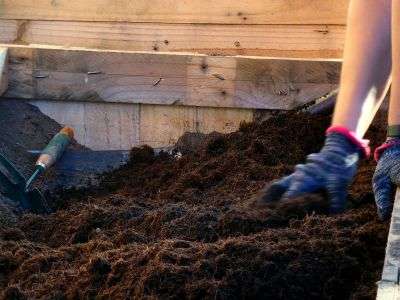
pH Levels: Garlic thrives in well-draining soil with a pH level between 6.5 and 7.5. You can test your soil’s pH using a home test kit. If the pH is too low (acidic), you can raise it by adding lime. If your soil is too alkaline (too high), you can add sulfur to lower the pH
Adding Compost: Enrich the soil by mixing in well-decomposed compost. This provides essential nutrients, improves drainage, and suppresses weeds.
Improving Drainage: If your soil is heavy or clayey (is that a word?), improve its drainage by adding organic matter or sand. Planting in containers or a raised bed is another option. Good drainage is crucial to prevent bulb rot.
Mulching: After planting, apply a 2-3 inch layer of straw or hay mulch. This helps retain soil moisture, suppress weeds, and protect young shoots from sudden frost.
Sourcing Quality Cloves:


Always buy garlic bulbs from a reputable nursery or seed supplier. Supermarket garlic might be treated to prevent sprouting and may not be suited for your zone.
When choosing garlic cloves for planting, look for healthy, disease-free cloves. Avoid cloves that are soft, mushy, or have any blemishes.
If you plan to use garlic cloves from your own harvest, make sure they are completely cured before planting. Curing is a process that dries out the garlic cloves and makes them more resistant to pests and diseases. To cure garlic cloves, place them in a single layer in a well-ventilated area for 2-3 weeks.
Container or Raised Bed Planting:
If you have limited space or poor soil, planting garlic in containers or raised beds is a great option. You’ll want to choose a container or raised bed that is large enough since garlic plants need at least 6 inches of space between each other. Their roots can grow up to 12 inches deep, so choose a container or raised bed that is at least 12 inches deep.
If you’re growing garlic in a container, make sure that the container has drainage holes in the bottom. Use a potting mix that is well-draining for either a container or raised bed.
Planting Garlic: A Detailed Guide
Clove selection and breaking them apart from the bulb:
When selecting garlic cloves for planting, choose cloves from the outer layer of the bulb. The outer cloves are the largest and often yield bigger bulbs.The cloves should be firm and plump, with no signs of mold or rot.
To break the cloves apart from the bulb, gently twist and pull them away from the bulb. Be careful not to damage the root plate at the bottom of the clove.
It’s best to separate the garlic cloves a day before planting.
Planting depth, spacing, and orientation:
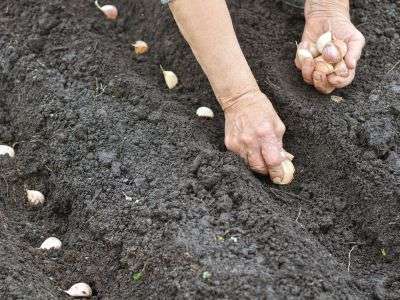
Depth: Plant each clove with the pointed about 2-3 inches deep.
Spacing: Space the cloves about 4-6 inches apart in each row. Rows should be spaced about 12-18 inches apart.
Orientation: The flat root end should be at the bottom and the pointed tip is facing upwards. This tip will grow into the green shoot
Initial Watering Needs
After planting, water the area thoroughly to settle the soil around the cloves. This initial watering helps the roots to establish themselves in the soil. Keep the soil moist until the garlic begins to sprout. You can tell that the garlic is starting to sprout when you see small green shoots coming out of the ground. Once the garlic has sprouted, you can water it less frequently. However, make sure to water it enough so that the soil does not dry out completely, while also trying to avoid leaving the soil too wet.
Caring for Your Garlic Crop in Zone 7:
Watering
Garlic needs consistent moisture. Water regularly, ensuring the soil remains damp but not waterlogged. Overwatering can lead to bulb rot.
Fertilizing
The best fertilizer for growing garlic is one that is high in nitrogen and potassium, and low in phosphorus. Garlic needs nitrogen for strong top growth, and potassium for bulb development. Phosphorus is not as important for garlic, and too much phosphorus can actually inhibit bulb growth.
Here are some specific fertilizer recommendations for garlic:
- Organic fertilizers: Compost, manure, bone meal, fish meal, and blood meal are all good organic fertilizers for garlic.
- Synthetic fertilizers: A balanced fertilizer with an NPK ratio of 10-10-10 or 15-10-10 is a good choice for garlic. You can also use a fertilizer that is specifically designed for garlic, if you can find it.
Fertilizing At Planting Time:
- A higher phosphorus content is beneficial to promote good root development.
- A good ratio to consider would be 10-20-10 or 5-10-5.
- Recommendation – Espoma Garden Food Fertilizer 5-10-5


Fertilizing During the Growing Season (Spring):
- As the garlic plant starts to grow, it will benefit from a balanced fertilizer that promotes both leafy growth (from nitrogen) and bulb development (from phosphorus and potassium).
- A balanced fertilizer like 10-10-10 or 15-15-15 can be applied in early spring when the shoots are about 6 inches tall.
- Recommendation – Southern Ag All Purpose Granular Fertilizer 10-10-10


How much fertilizer to use and when to apply it will depend on your soil type and climate. In general, you should fertilize garlic twice: once in the early spring, and again just before the bulbs start to swell.
To fertilize garlic, side dress the plants with fertilizer, or broadcast the fertilizer over the soil and water it in. Be sure to follow the directions on the fertilizer label.
Make sure not to over-fertilize your garlic since that can harm the plant.
Weeding
Keep the garlic bed free from weeds. Weeds compete with garlic for nutrients and can hinder bulb growth.
Make it a regular habit to pull out any weeds when you see them starting to grow.
Mulching
Replenish the mulch layer if it thins out. This helps in moisture retention and weed suppression.
Pest and Disease Control
Regularly inspect your garlic plants for signs of pests or diseases. Early detection and intervention can prevent minor issues from becoming major problems. Consider using organic pesticides or fungicides if needed.
Common Garlic Pests and Diseases
- Onion Maggots: These pests can damage the garlic bulbs. Rotate your crops and avoid planting garlic in the same spot every year to prevent them.
- White Rot: This fungal disease affects the roots. Provide your garlic with good drainage and avoid overwatering to prevent white rot.
- Rust: This is a fungal disease that affects the leaves. Ensure proper spacing for good air circulation and remove affected leaves as soon as you see them.
- Nematodes: These microscopic worms can affect garlic growth. Crop rotation and soil solarization can help manage them.
Bonus Tip – Scapes!

As your hardneck garlic grows, it’ll produce a curly green stalk known as a scape. These scapes can be harvested and used in cooking for a mild garlic flavor. Removing them also allows the plant to direct more energy into bulb formation.
Harvesting, Curing, and Storing Garlic:
Signs Your Garlic is Ready for Harvest:
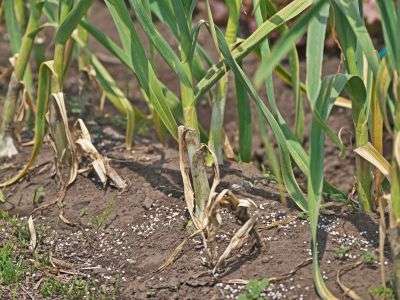
Garlic is ready for harvest when the leaves begin to yellow and dry out, while the top leaves remain green. Typically, when about one-third of the leaves have yellowed and wilted, it’s time to harvest.
You can also dig up a test bulb to check its size. If the cloves fill out the skins and the bulb has a good size, it’s ready.
If you dig up a garlic bulb to test if it’s ready and it’s not, you can replant it. However, it’s important to be gentle when replanting the bulb to avoid damaging it. Be sure to plant the bulb at the same depth as before and water it well. Keep in mind that replanted bulbs may not grow as large as those that were not disturbed .
Harvesting Techniques to Avoid Damage:
When harvesting garlic, it’s important to be gentle to avoid damaging the bulbs. Use a garden fork or spade to gently loosen the soil around the garlic bulbs. Avoid pulling the garlic out by the stem.
Gently brush off any loose soil but avoid washing the bulbs, as moisture can lead to rot during storage.
Leave the bulbs attached to the stems, as this will help them to cure properly, which is the next step…
Curing Garlic for Longevity:
Curing is the process of drying out the garlic bulbs so that they can be stored for longer periods of time. This allows the skins to harden and the remaining moisture to evaporate.
To cure garlic, place the bulbs in a cool, dry, well-ventilated area out of direct sunlight. This can be on a wire rack, or hanging them in a dark place. The bulbs should be spread out in a single layer so that air can circulate around them.
The curing process can take anywhere from two weeks to two months, depending on the climate and the size of the bulbs. Once the bulbs are cured, trim off the roots and cut the stems, leaving about an inch.
Best Practices for Long-Term Storage:
Cured garlic can be stored for several months in a cool, dry place. Here are some tips for storing garlic:
- Braiding: This method is suitable for softneck garlic. Braid the stems together and hang in a cool, dry place.
- Mesh Bags: Storing garlic in mesh bags is also a good way to store garlic because it allows for good air circulation.
- Paper Boxes: Paper boxes with holes cut out are also a good choice too as they allow air circulation while keeping bulbs in a dark environment.
Avoid storing in plastic bags or sealed containers, as lack of airflow can cause rot.
What Month to Harvest Garlic:
In Zone 7, the specific month to harvest garlic can vary based on the variety of garlic you’ve planted and the weather conditions during the growing season. However, here are some general guidelines:
- Fall-Planted Garlic: Typically, garlic planted in the fall is ready for harvest the following summer. For Zone 7, this usually means harvesting between late June to mid-July. The exact timing can vary based on the variety and local climate conditions. For instance, hardneck garlic varieties might be ready a bit earlier than softneck varieties.
- Spring-Planted Garlic: If you planted garlic in the spring, expect to harvest it a bit later than fall-planted garlic, usually in late July or early August.
It’s essential to monitor your garlic plants for the visual signs of readiness, such as the yellowing of the lower leaves, rather than relying solely on the calendar. This ensures you harvest the garlic at its peak for the best flavor and storage potential.
Culinary Delights: Recipes with Garlic:

Garlic is a versatile ingredient that can be used in so many different recipes. Here are some simple to complex garlic recipes that you can try with your homegrown garlic:
Simple Garlic Butter:
Mix softened butter with minced garlic and herbs of your choice and a bit of salt, if using unsalted butter. This is great to spread on bread or use as a topping for grilled meats or steamed vegetables.
Garlic Confit:
Slowly cook garlic cloves in olive oil over very low heat until they are soft and golden. Store in the refrigerator and use on bread, pasta, or as a spread.
Roasted Garlic:
Cut off the top of a garlic bulb, drizzle with olive oil, and roast until soft. The cloves become sweet and spreadable, perfect for toast or mixing into mashed potatoes.
Basic Garlic Powder:
Preheat oven to 150 degrees Fahrenheit. Slice garlic cloves into thin pieces, then spread them out on a baking sheet lined with parchment paper. Bake for 1-2 hours, or until the garlic is completely dry and brittle. Let the garlic cool completely, then grind it into a powder using a spice grinder, mortar and pestle, or food processor.
Garlic Bread:
Brush sliced bread with olive oil, or melted butter, and sprinkle with minced garlic or homemade garlic powder and Parmesan cheese. Bake in a preheated oven at 350 degrees Fahrenheit for 10-12 minutes, or until golden brown.
Garlic Scapes Pesto:
Combine garlic scapes, Parmesan cheese, pine nuts, olive oil, and salt and pepper in a food processor and blend until smooth. Serve over pasta, vegetables, or bread
Common Mistakes and How to Avoid Them:
Here are some common mistakes that some gardeners make when growing garlic:
- Planting too late: Garlic needs time to develop roots before winter sets in, so it’s important to plant it early enough. Plant garlic so that it has at least six weeks to develop roots before the ground freezes. The best time to plant garlic is usually in late October or early November.
- Overwatering: Garlic needs regular watering but should not be overwatered since waterlogged conditions can lead to bulb rot.
- Not removing scapes: Garlic scapes should be removed when they appear so that energy can be directed towards bulb growth rather than flowering.
- Harvesting too early: Wait until the leaves begin to yellow and dry out before harvesting your garlic. If you harvest your garlic too early, the cloves will not be fully developed and will not store well.
- Harvesting too late: If you leave garlic in the ground for too long, the over-ripened bulbs will split and form shoots from each clove. The protective outer layers of the bulb may also deteriorate, exposing the cloves. Both of these problems would make them more susceptible to rotting during storage
- Planting Store-Bought Garlic: Supermarket garlic might be treated to prevent sprouting. I recommend buying garlic from a reputable nursery or seed supplier, but you can always try store-bought garlic if you want to test it out.
- Planting Too Deep or Too Shallow: Plant cloves about 2-3 inches deep for optimal growth.
- Ignoring Soil pH: Garlic prefers a pH level between 6.5 and 7.5. Test and amend your soil if necessary.
- Over-curing: If you over-cure your garlic, the cloves will become dry and brittle.
- Storing in a humid environment: Garlic should be stored in a cool, dry place. If you store garlic in a humid environment, mold is likely to grow.
Additional Tips and Insights:
Here are some additional tips and insights about growing garlic:
Companion Planting with Garlic:
Garlic is a natural pest repellent for pests like aphids, carrot fly, flea beetles, Japanese beetles, and spider mites, making it a good companion for many different plants.
Here are some examples of how companion planting with garlic can help specific plants:
- Garlic and tomatoes: Garlic can help to repel pests that attack tomatoes, such as aphids and spider mites. It can actually improve the flavor of tomatoes as well*.
- Garlic and carrots: Garlic can help to repel carrot fly and improve the flavor of carrots*.
- Garlic and beets: Garlic can help to repel pests that attack beets, such as leaf miners and aphids.
- Garlic and strawberries: Garlic can help to repel pests that attack strawberries, such as slugs and nematodes.
- Garlic and Brassicas (like Brussels sprouts and kohlrabi): Garlic can help repel cabbage loopers and cabbage moths.
- Garlic and Fruit Trees: When planted around the base, garlic can deter borers and other pests
- Garlic and roses: Garlic can help to repel aphids and black spot fungus from roses.
Some gardeners (like me) believe garlic can improve the flavor of certain fruits and vegetables when planted nearby, but there isn’t actually any scientific evidence to support this. Im still happy with the taste placebo effect.
Good companion plants for garlic include:
- Vegetables: Beets, broccoli, cabbage, carrots, cauliflower, celery, eggplant, kale, lettuce, peppers, potatoes, radishes, spinach, strawberries, tomatoes, cucumbers, Brussels sprouts, kohlrabi
- Herbs: Basil, chamomile, chives, cilantro, dill, fennel, lavender, marigolds, mint, nasturtiums, oregano, rosemary, rue, summer savory, thyme
- Flowers: Roses, marigolds (which can deter nematodes and other pests)
- Fruits: Planting garlic at the base of fruit trees and around grapevines can offer protection against certain pests
Incompatible Planting
Garlic is a member of the allium family, so it’s best to avoid planting it with other alliums, such as onions, leeks, chives, and shallots. This is because alliums can compete with each other for nutrients and water, but more importantly, they can also attract pests and diseases.
Other plants to avoid planting with garlic:
- Beans: Garlic can inhibit the growth of beans.
- Peas: Similar to beans, garlic can have a negative effect on the growth of peas.
- Sage: Garlic can inhibit the growth of sage, and they compete for space and nutrients.
- Parsley: Garlic can stunt the growth of parsley.
- Asparagus: While some sources suggest garlic can be beneficial for asparagus, others indicate that they can compete for nutrients.
- Potatoes: Garlic might increase the risk of potato blight
It is also important to note that garlic can be a heavy feeder, so it is important to avoid planting it with other plants that have similar nutrient requirements. This is because garlic may compete with the other plants for nutrients.
Also, garlic should not be planted in the same spot two years in a row. This is because garlic can deplete the soil of nutrients, and it can also leave behind pests and diseases.
Health benefits and nutritional facts about garlic:
Garlic is a nutritious food that is low in calories and high in vitamins and minerals. It is also high in vitamins C and B6, manganese, selenium, and fiber. Garlic has been shown to have anti-inflammatory, antioxidant, and antimicrobial properties. Regular consumption can sometimes help lower blood pressure and cholesterol levels.
Using garlic in home remedies:
Garlic has been used for centuries as a natural remedy for various ailments such as colds, flu, infections, and high blood pressure . However, it’s important to talk to your doctor before using garlic as a supplement or alternative treatment.
- Cold and Flu: Garlic’s antimicrobial properties can help in treating cold and flu symptoms. Consuming garlic tea or broth can provide relief. (source)
- Skin Infections: A paste made from crushed garlic cloves can be applied to fungal skin infections, but always do a patch test first to avoid skin irritations. (source)
- Digestive Health: Garlic can aid in digestion and combat gastrointestinal infections due to its antimicrobial properties. It’s also believed to help in flushing out toxins from the body. (source)
- Boosting Immunity: Regular consumption of garlic is thought to boost the immune system, helping the body fend off various diseases. (source)
- Toothache: Due to its antibacterial and analgesic properties, garlic can be used as a temporary remedy for toothaches. To use garlic for a toothache, crush a garlic clove and place it on the affected tooth. Leave the garlic on for 10-15 minutes before rinsing it out of your mouth. You should always consult a dentist for persistent issues. (source)
Caution: While garlic is beneficial, excessive consumption can lead to bad breath, a burning sensation in the mouth or stomach, heartburn, gas, nausea, body odor, and diarrhea. It can also thin the blood, which might be a concern for people taking blood-thinning medications.
Wrapping it Up
You’ve just learned everything you need to know to grow garlic successfully in Zone 7. From choosing the right variety to planting, caring, harvesting, and storing your garlic, this guide has covered all the essential steps and tips.
Growing garlic in Zone 7 can be a rewarding and enjoyable experience, as you’ll be able to enjoy fresh, flavorful, and healthy garlic from your own garden. Whether you use it for cooking, home remedies, or companion planting, garlic is a versatile and valuable crop that deserves a spot in your garden. I hope this guide has inspired you to start or improve your garlic gardening journey in Zone 7.
If you have any questions or feedback, feel free to leave a comment below. And don’t forget to check out our other articles on Zone 7 gardening for more helpful advice and information. Happy gardening!


